Azure Deployment Environments
If I had a pound for every minute I’ve spent setting up my local development environments, I probably wouldn’t be writing this blog post. Containers and tools like Docker Desktop have helped us take a big step forward, but cloud systems still use resources that can’t easily be run within a local container; just take Azure KeyVault and ServiceBus for example.
Microsoft has introduced Azure Deployment Environments as their solution to this problem, the idea being your platform engineering team curates a set of infrastructure templates into a catalog, and developers self-serve from that catalog at the click of a button:
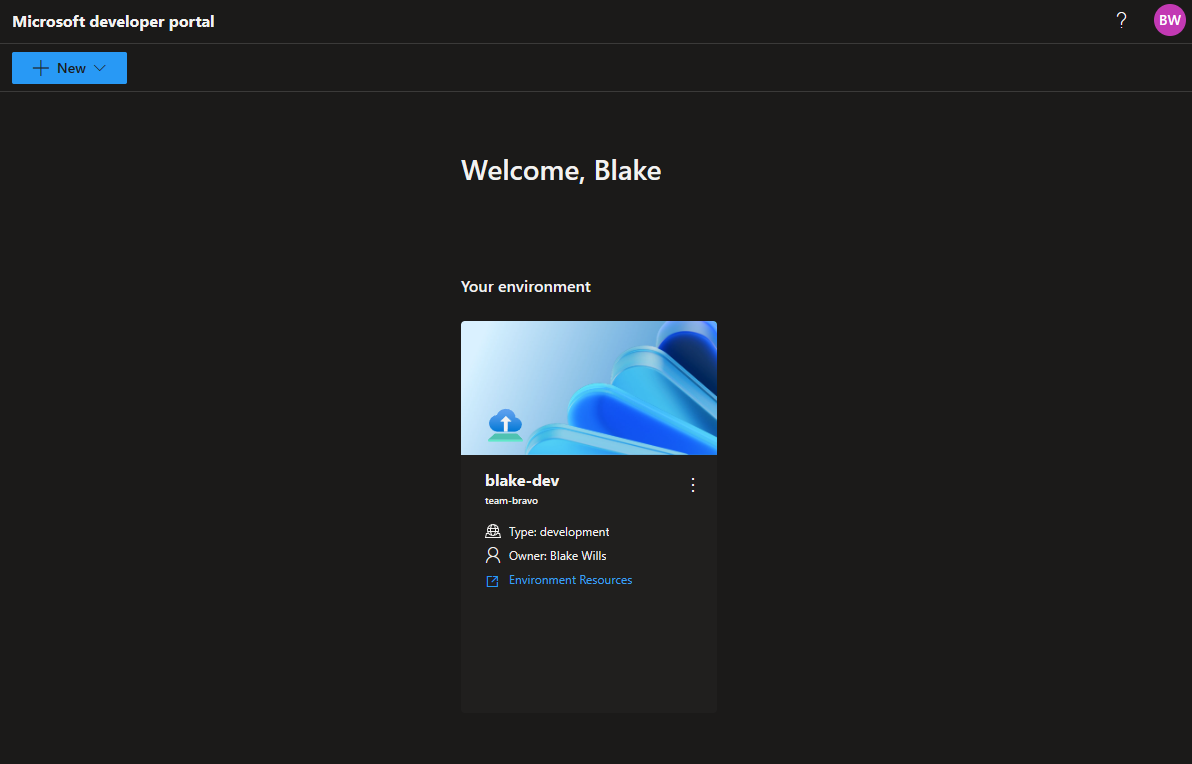
In this post we’ll walk through the setup needed to be able to deploy an environment.
Create a Catalog
A catalog is a git repository containing environment definitions that is hosted in Azure DevOps or Github. An environment definition contains an infrastructure template and a manifest file.
Currently only ARM templates are supported (🤮), but Terraform support is in private preview, and Pulumi and Bicep support is coming soon. To keep it simple we’ll use a template that deploys a Web App to an App Service Plan:
{
    "$schema": "https://schema.management.azure.com/schemas/2019-04-01/deploymentTemplate.json#",
    "contentVersion": "1.0.0.0",
    "parameters": {
        "location": {
            "type": "string",
            "metadata": {
                "description": "Location to deploy the resources",
                "defaultValue": "[resourceGroup().location]"
            }
        },
        "name": {
            "type": "string",
            "metadata": {
                "description": "Name of the deployment environment"
            }
        }
    },
    "functions": [],
    "variables": {
        "asp-name": "[format('{0}-asp', parameters('name'))]",
        "app-name": "[format('{0}-webapp', parameters('name'))]",
        "asp-id": "[concat(resourceGroup().id, '/providers/Microsoft.Web/serverfarms/', variables('asp-name'))]"
    },
    "resources": [
        {
            "name": "[variables('asp-name')]",
            "type": "Microsoft.Web/serverfarms",
            "apiVersion": "2022-09-01",
            "location": "[parameters('location')]",
            "sku": {
                "name": "F1",
                "capacity": 1
            },
            "tags": {
                "environmentName": "[parameters('name')]"
            },
            "properties": {
                "name": "[variables('asp-name')]"
            }
        },
        {
            "name": "[variables('app-name')]",
            "type": "Microsoft.Web/sites",
            "apiVersion": "2022-09-01",
            "location": "[parameters('location')]",
            "tags": {
                "[concat('hidden-related:', variables('asp-id'))]": "Resource",
                "environmentName": "[parameters('name')]",
                "azd-service-name": "api"
            },
            "dependsOn": [
                "[resourceId('Microsoft.Web/serverfarms', variables('asp-name'))]"
            ],
            "properties": {
                "name": "[variables('app-name')]",
                "serverFarmId": "[resourceId('Microsoft.Web/serverfarms', variables('asp-name'))]"
            }
        }
    ],
    "outputs": {}
}
Now the manifest file, this needs to be called environment.yaml but the contents is fairly self-explanatory:
name: WebApp
version: 1.0.0
summary: Azure Web App Environment
description: Deploys a web app in Azure without a datastore
runner: ARM
templatePath: template.json
parameters:
- id: "location"
  name: "location"
  description: "Azure region to deploy resources"
  default: "uksouth"
  type: "string"
  required: false
- id: "name"
  name: "name"
  description: "Name of the environment"
  type: "string"
  required: true
The key bits are:
name- needs to be unique and gets displayed in the Developer Portal.templatePath- relative path to the ARM template.parameters- these reference theARMtemplate parameters, unfortunately you can’t useARMexpressions for things like thedefaultvalue, but you can limitallowedvalues for things like SKUs.
The documentation does a pretty good job of explaining the manifest file.
Azure DevCenter
Azure DevCenter is the control plane that allows platform engineers to define project teams, catalogs and environments. It’s also the control plane for Azure DevBox, which we’ll talk about in a future post. You don’t need anything special to deploy a DevCenter, just the usual resource group, location, and name:
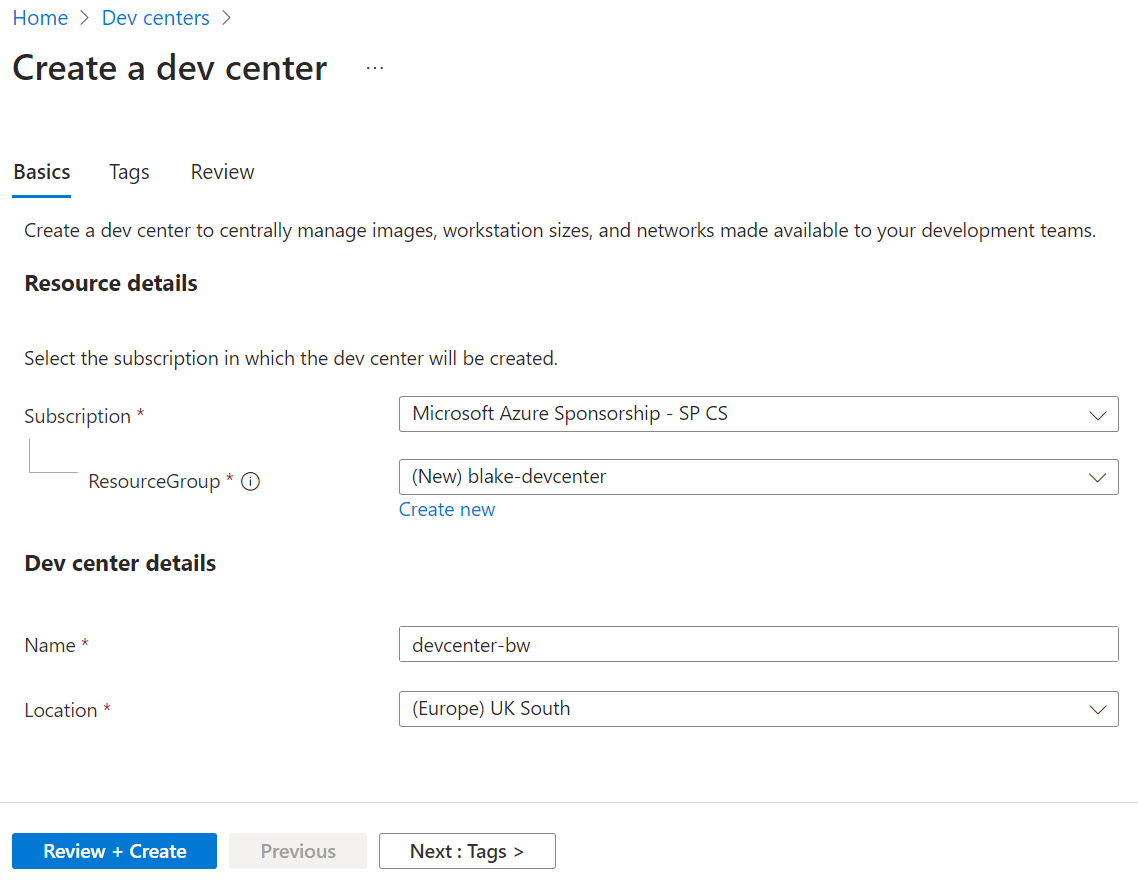
Note: DevCenter is free, you only pay for the resources it deploys as part of your environment.
Add a Catalog
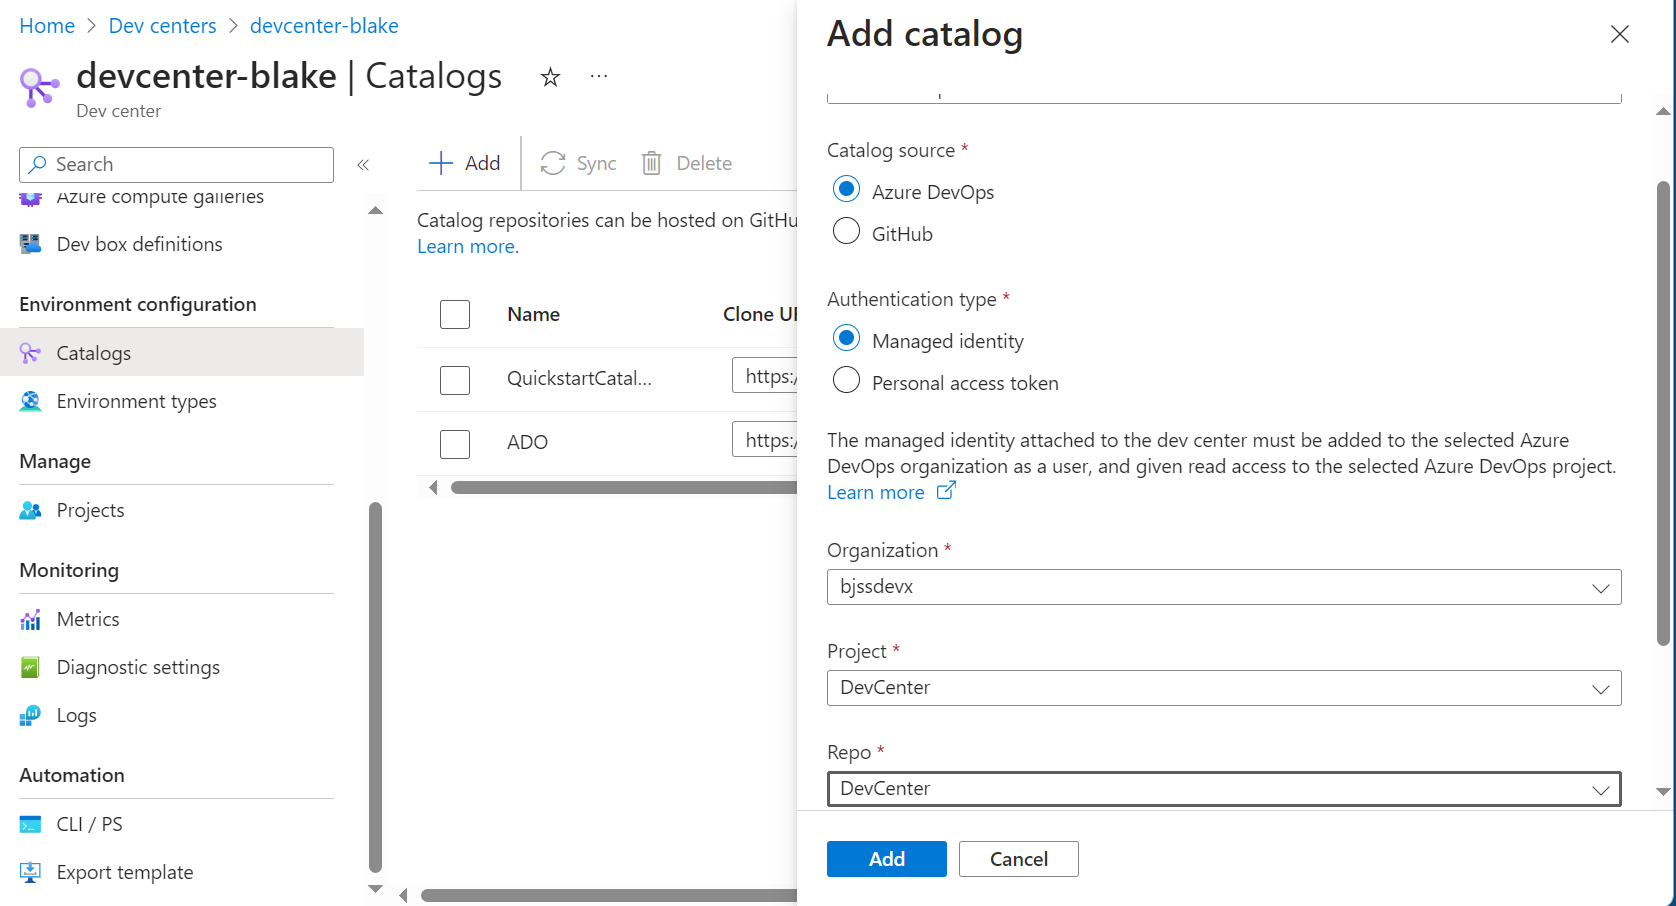
Before we add a catalog we need to assign a system-managed identity and then add the service principal as a user to your Azure DevOps tenant, which lets DevCenter access the repository.
Once that’s setup, we can add our catalog:
Create the Environment Types
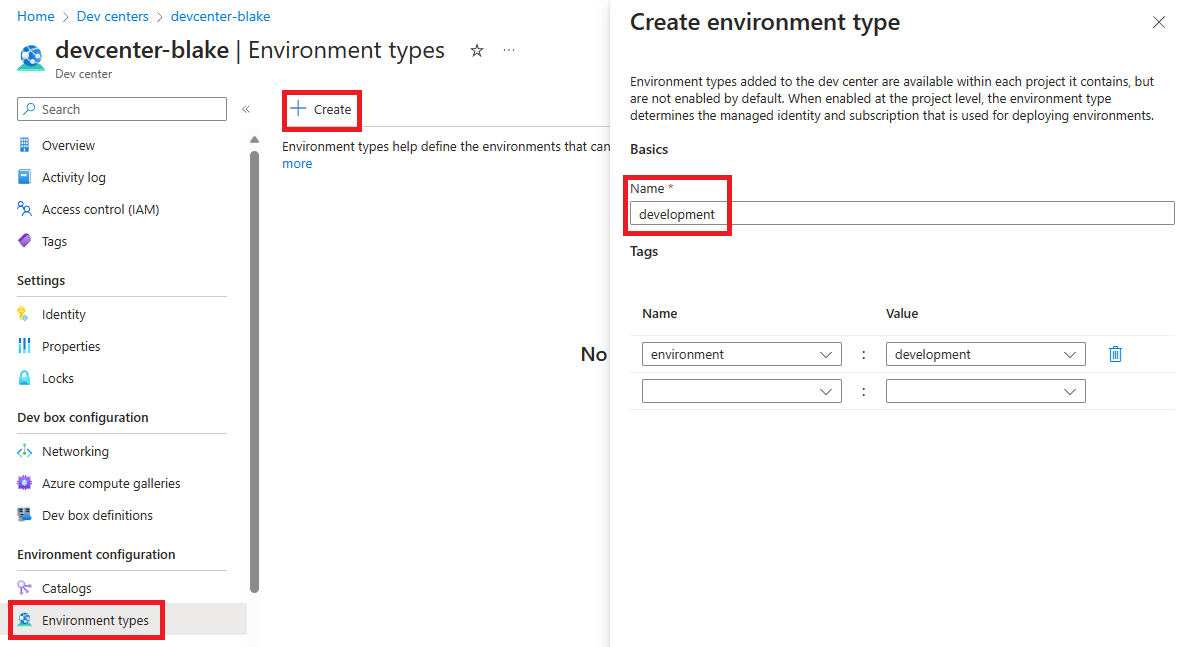
Environment Types are just the names of the environments developers can deploy to, in this case I’ll use development. You can also define tags that get added to any deployed environment resources, don’t worry about adding tags for team or project-specific values, we can do that at the project level next.
I like to add an environment tag to help figure out where my money is being burnt well-spent.
Create a Project
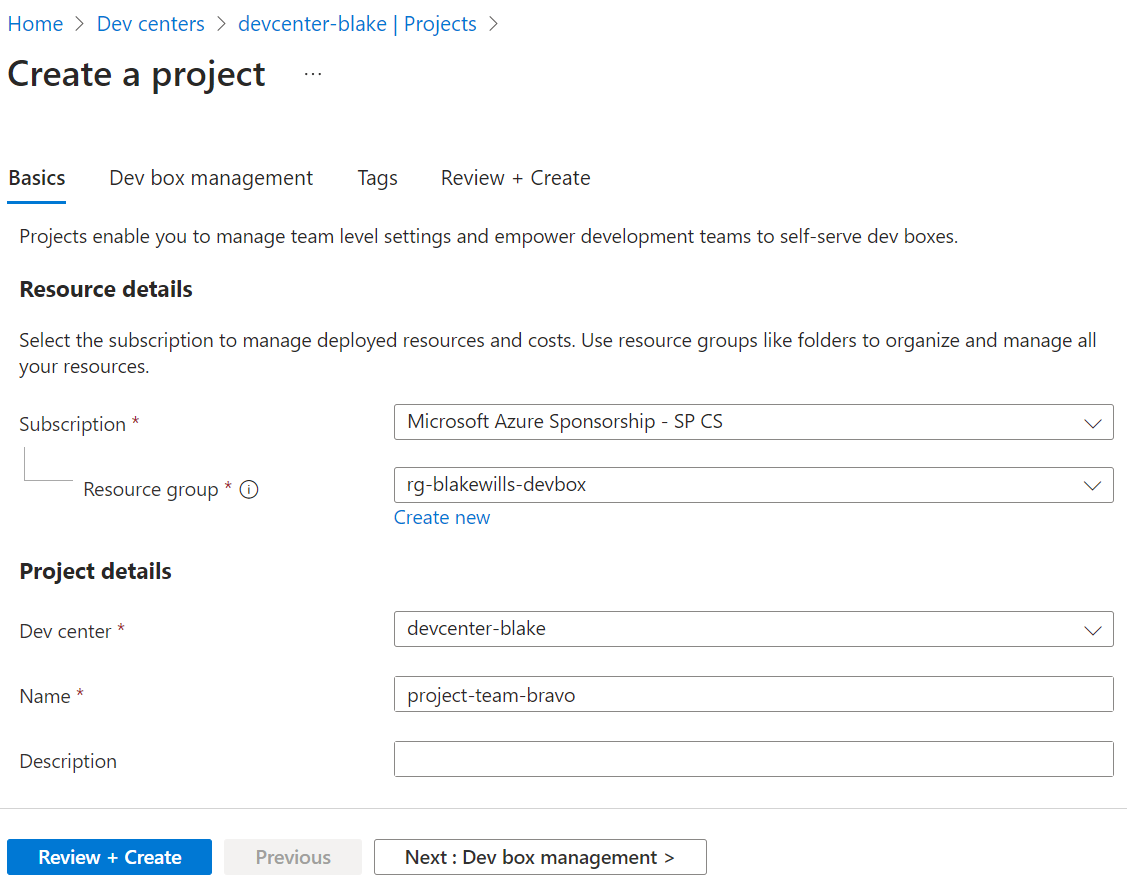
Next, we need to define a project, think of this as the team or business unit whose engineers will want to self-serve environments. Again all you need here is a name, you can ignore the “Dev Box Management” tab.
Configure the Project
Now we define our project-level Environment Types, which is where we map the environment to an Azure Subscription.
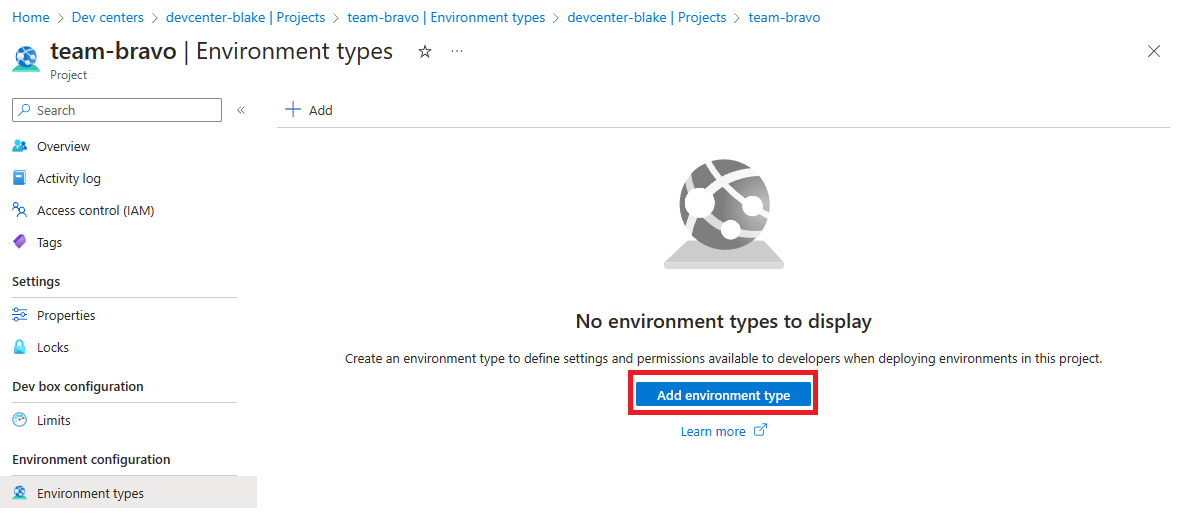
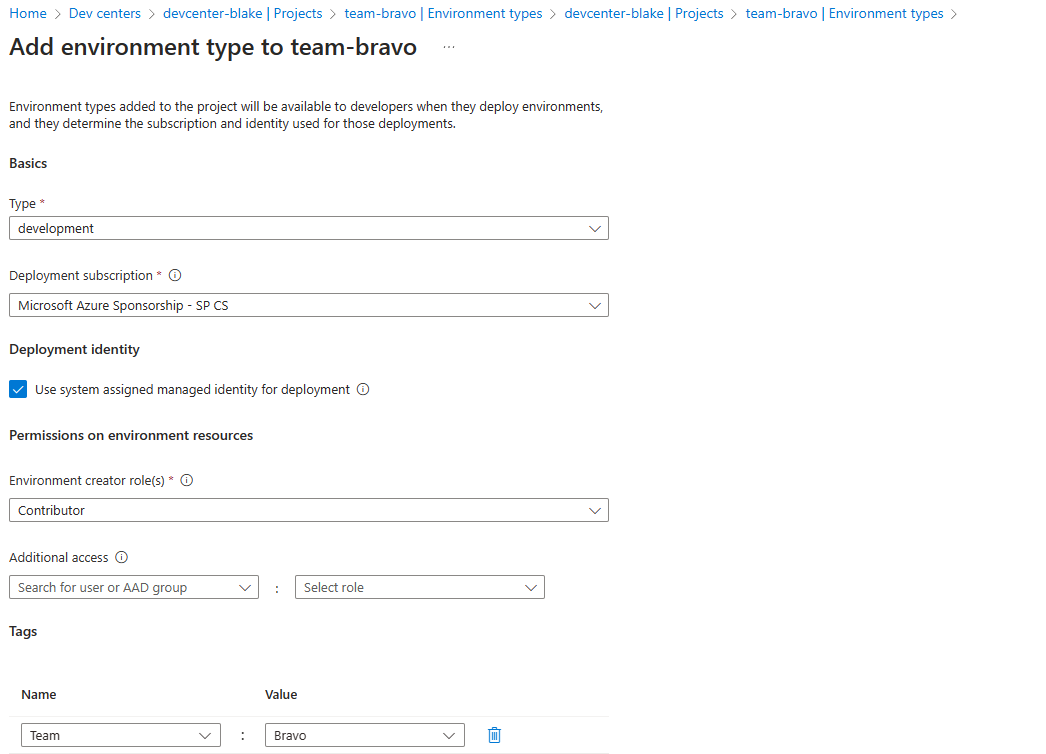
Deployment Identity is the identity that deploys the resources on behalf of the developer, and can either be the DevCenter system-managed identity, or a user-managed identity of your choosing. The identity will need at least a Contributor role assignment against the mapped subscription to be able to deploy resources. One benefit of using Deployment Environments is developers no longer need contributor access to the subscription to deploy resources.
Environment Creator Roles are the role assignments you want to grant to the developers over their new environment.
Tags will get added to the resources, this is where you can add team/project-level values.
Adding project team members
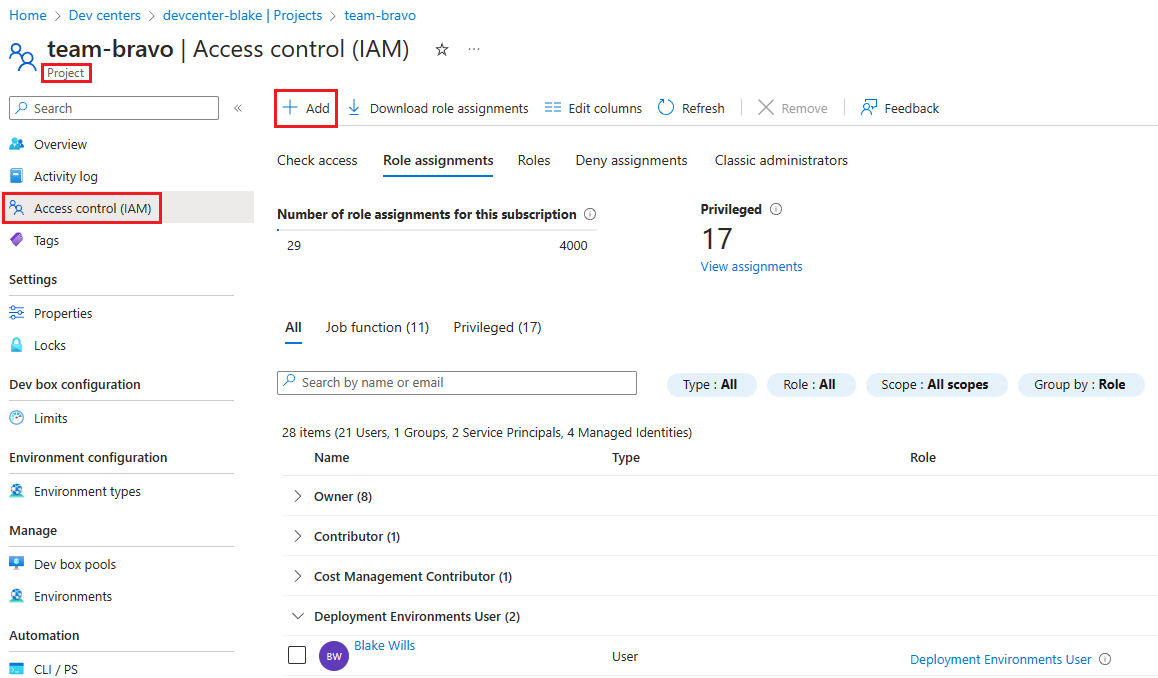
There are two roles to be aware of within the scope of a Project:
DevCenter Project Admin- Granted to team leads who can manage the environment types and developers within a specificProject.Deployment Environments User- Granted to developers within a team/project to be able to self-serve environments.DevCenter Project Adminscan deploy environments by default, they don’t need both roles.
I’ll add myself as a Deployment Environments User.
Developer Self-Service
We’ve got everything set-up, time to deploy our first environment! There are multiple ways to do this, I’ll show the developer portal but you can also integrate with the Azure Developer CLI and az cli.
Login to the Microsoft developer portal, click New > New Environment and give it a name. We’ll be asked to enter values for our ARM template parameters on the next screen.
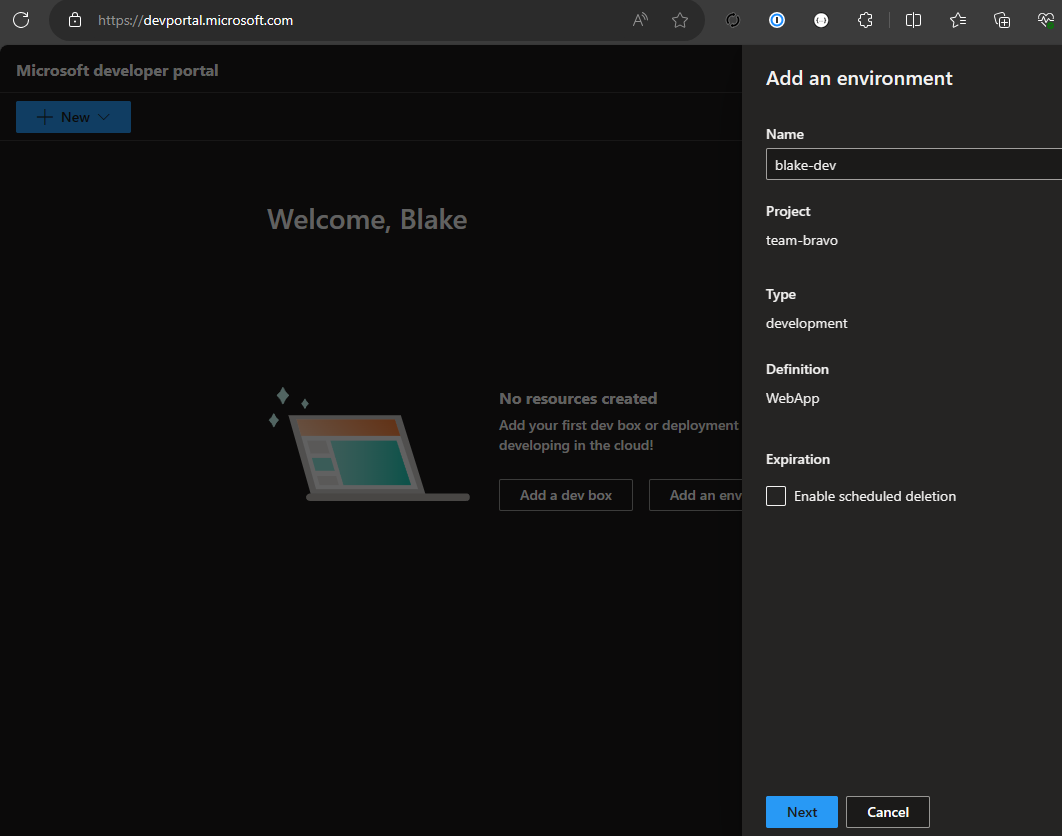
The resources will be deployed to a resource group named team-[projectName]-[environmentName] and you’ll be able to access them from the developer portal. We also get options to delete the environment, as well as an option to schedule deletion for a point in the future.

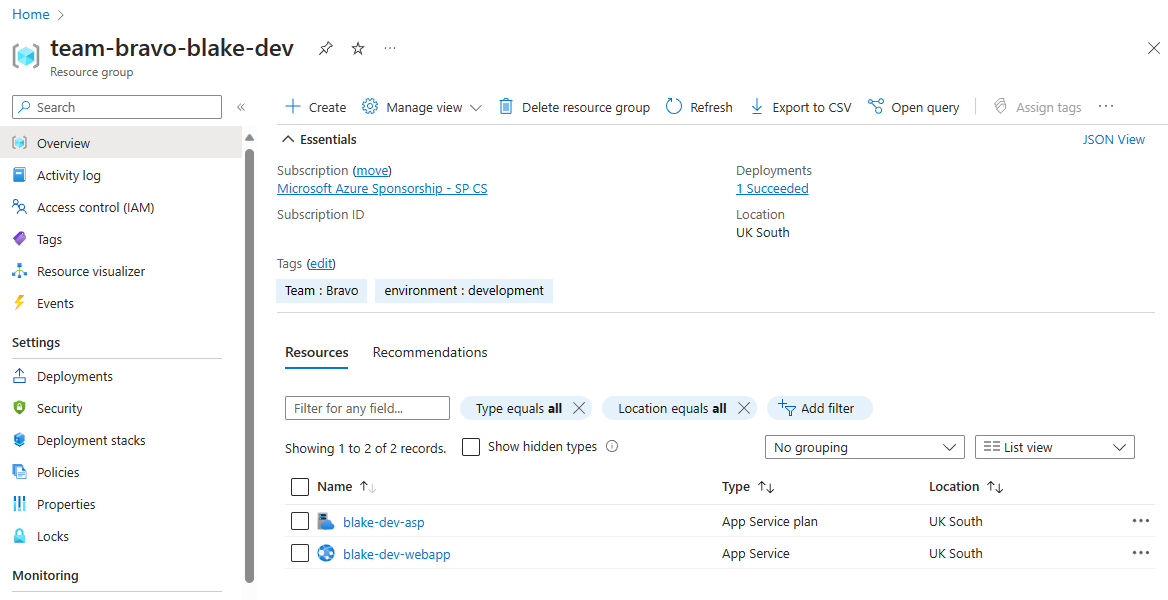
Environment Management
Self-serve environments are great for developer productivity, but can cause costs to rise. Whilst we can centrally manage the list of deployed environments from the Environments tab within the project, it only gives you a link to the resource group to view the costs.
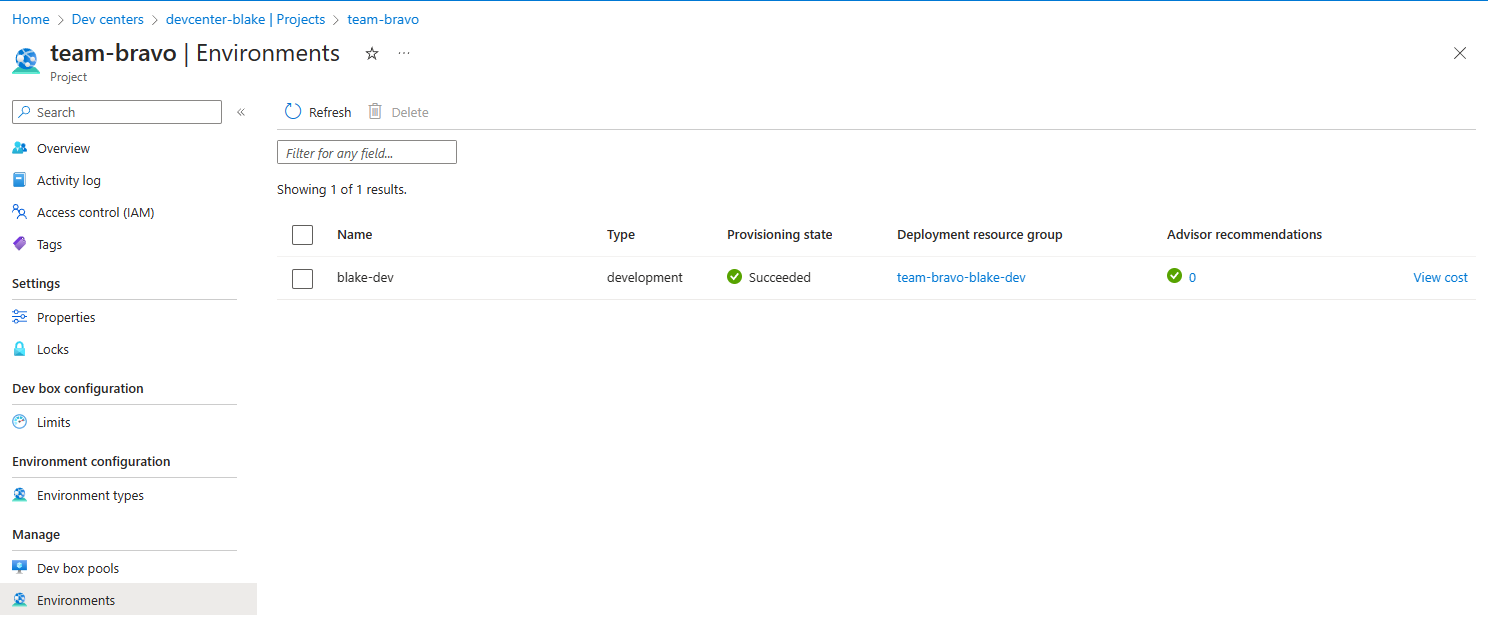
I’d love to see an actual cost value here, as well as the deployment date so we can see how long resources have been provisioned.
Closing
I can see deployment environments being a great tool to fill the gaps when resources can’t be run in a local container. If you can run your entire environment locally using docker then this isn’t going to add much value (I know, I know, says the guy who just used an app service as an example). If you don’t want to jump right in a great starter use-case could be self-serve provisioning of ServiceBus queues and topics for event-driven systems, which I know from experience can be a pain for local debugging.
There are a few “gotchas” to be aware of: the design of DevCenter and the catalog really lends itself to having one team manage the infrastructure and another develop the application. This becomes really evident when you have a developer working on a feature that requires some infrastructure changes - there isn’t really a workflow to have the developer update the template for their own environment without merging the changes into main. The way around this is to give them Contributor access as part of the Environment Creator Roles so they can reconfigure and deploy new resources to their own environment outside of the template. That doesn’t mean you need to give them total free rein though, you can still reject certain configurations through Azure Policy.
We’ve mentioned it once but it’s worth mentioning again: cost management. There are a few controls that I’d like to see that are missing, such as enforcing deletion after a set time period and limiting the number of environments a developer can create. I’d strongly recommend taking advantage of the “allowed values” parameter within the manifest to lock down which SKUs your developers are allowed to deploy; premium SKUs are great for production but not for local testing. There’s a similar message for how you define your infrastructure templates, in an ideal world you would use the same templates for local environments as you would for production, but if your current templates deploy the full networking and observability stack, you might want to break those apart.
